 The great thing about building your own hosting solution instead of renting from a provider is you’ll get an idea what’s goes on under the hood of a typical website. AWS is pretty good for that: you get a free taster of bigger things and can experiment and learn as you go.
Here’s how to build one for your experimental project, a blog or perhaps a beer o’clock monitor!
Recipe
- Email address for accessing AWS
- Phone number as registering to AWS will trigger an automated call to verify you’re a real person
- Credit card as Amazon will charge you if you go over the free tier limits (which you won’t do of course!)
I will keep this fairly simple and won’t go into AWS auto-scaling and similar features although it’s pretty easy to extent what you’ve built afterwards to give your site more redundancy and reliability. The instructions here are valid for Ubuntu Linux and you’ll need to do some steps differently if you are looking to build for example a Windows based solution.
Register an AWS account
Follow the instructions on the AWS website to create your account.
The instructions to me are pretty self explanatory and there’s plenty of help available if you get stuck. Note that the account activation won’t be instant: AWS will call you (at least in the UK) to verify your identity. The call is automated. http://aws.amazon.com/
Start building!
1. Once you’ve registered, go into AWS console
And login with your account.
2. Select the region you want to host your solution
 First step is to select whereabouts in the world the instance will be started. I use EU (Ireland) as it’s the nearest AWS datacenter to my physical location and where I expect most of the traffic to come from. For redundancy, it would be better to host your stuff on multiple regions but as mentioned we’ll keep this fairly simple for now.
Pick the region from the upper right hand corner.
3. Create a permissions key
You’ll need the permissions key (.pem file) to access your instance when it’s launched, thus create it before.

Click Key Pairs Click Create Key Pair. Give your permissions key a name and click create.
Read more about permissions keys and cryptography at http://docs.aws.amazon.com/AWSEC2/latest/UserGuide/ec2-key-pairs.html
DO NOT lose this key or give it to anyone else. Promise?
3. Create an instance and a security group
Instance is the box/the server/the host you want your stuff to run on as explained also by AWS.
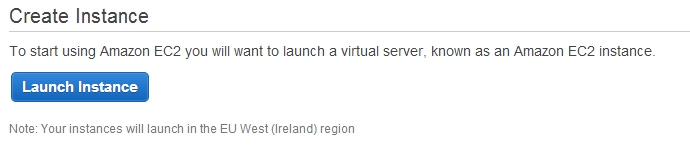 First, click Launch Instance which can be found under Create Instance -section and you should end up on the Amazon Machine Image selection screen:
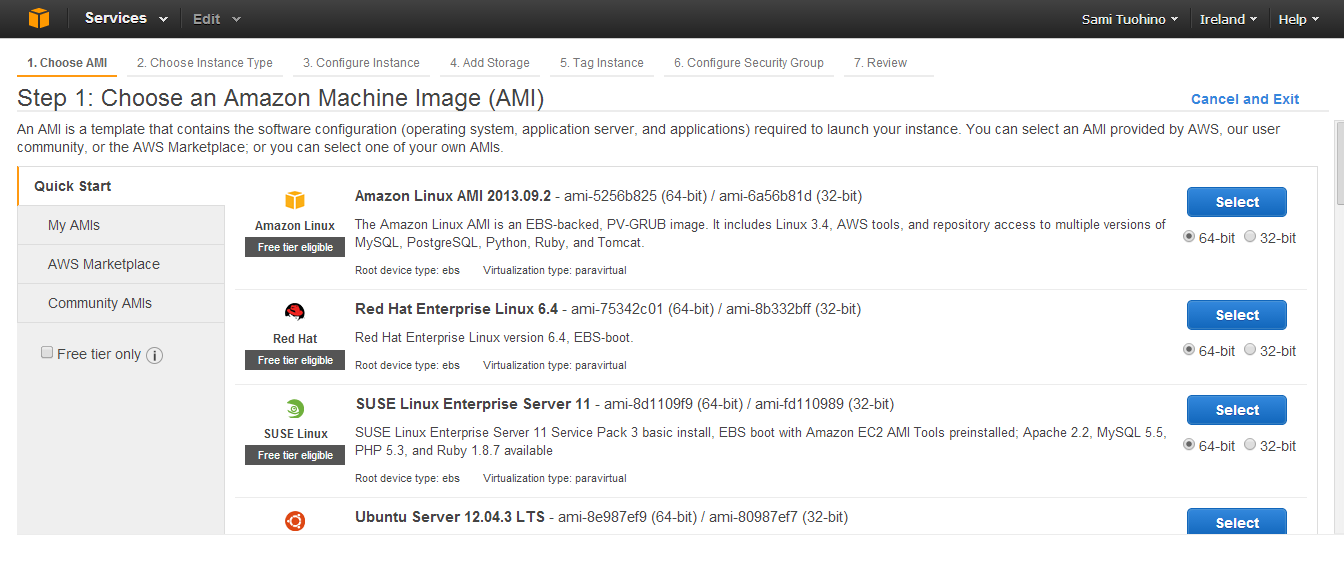 This is where you pick which Operating System you want to run. An AMI is basically a snapshot a bare boned OS that will run but won’t have too much on it. I’m going with Linux, Ubuntu Linux. 64 bit.
 Check that the Ubuntu AMI says ‘Free tier eligible’ as there’s quite many pre-built images on the list.
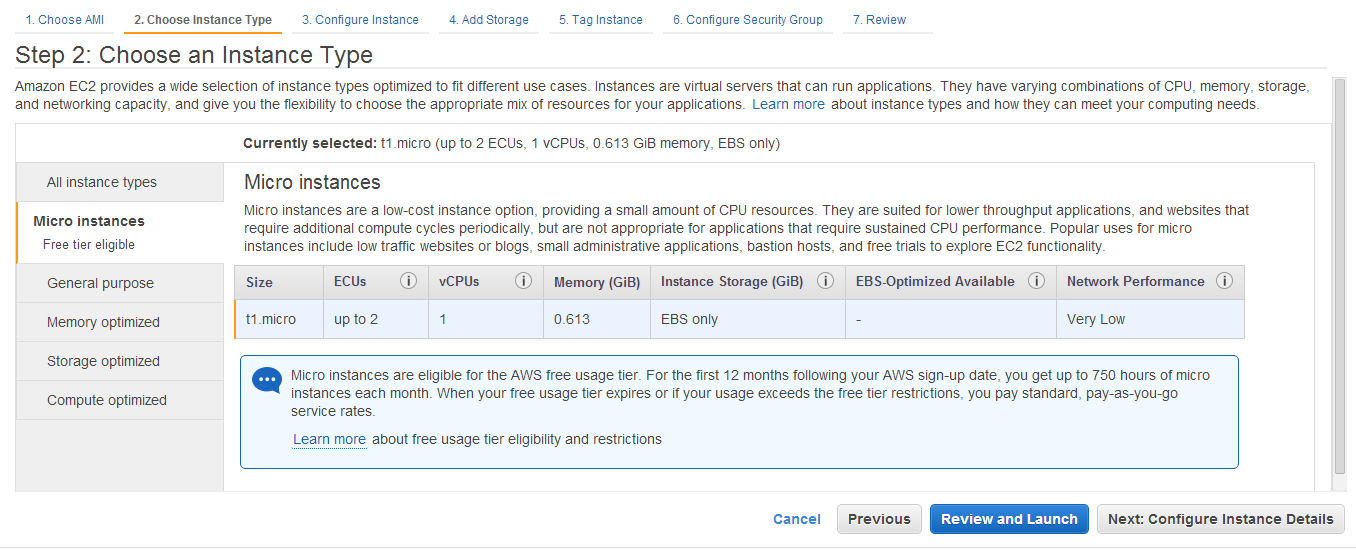
Click Select and you will end up on Select Instance Type -page. Only Micro instances are eligible for the free tier - leave it so.
Click Review and Launch for a shortcut.
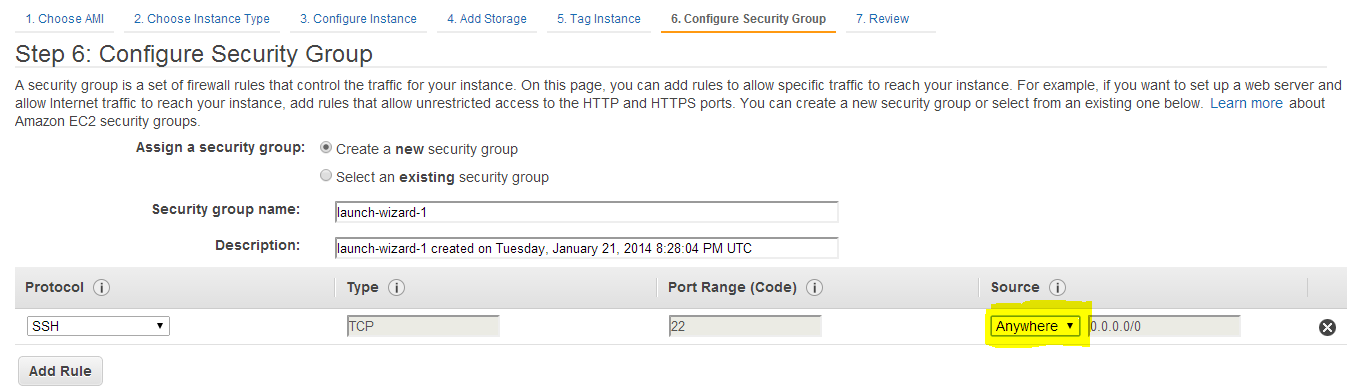
 You should get a scary looking screen telling you to improve security. You should.
 I’d recommend keeping the security settings pretty tight and restrict access to your instance based on your IP only for certain ports.
Change the Source Anywhere to My IP and click add rule. This will limit access to only your IP address and the port 22 used by SSH. The downside is: if your IP changes when you for example reboot your router, you’ll have login to AWS to change the I the security group settings.
You can always add more similar rules to allow access to the box from example from your office in a similar manner.
 You’re now ready to launch your instance. Click Review and Launch, then Launch from the next page after you’ve skimmed through the settings. It’ll take a couple of minutes for the instance to start and the automatic health checks to pass.
Hello web server!
 Okay, it’s not a web server yet but soon will be.
You should be able to hit your host from the instances public DNS to your browser. To be continued…
- Missing a step? Let me know in the comments please.